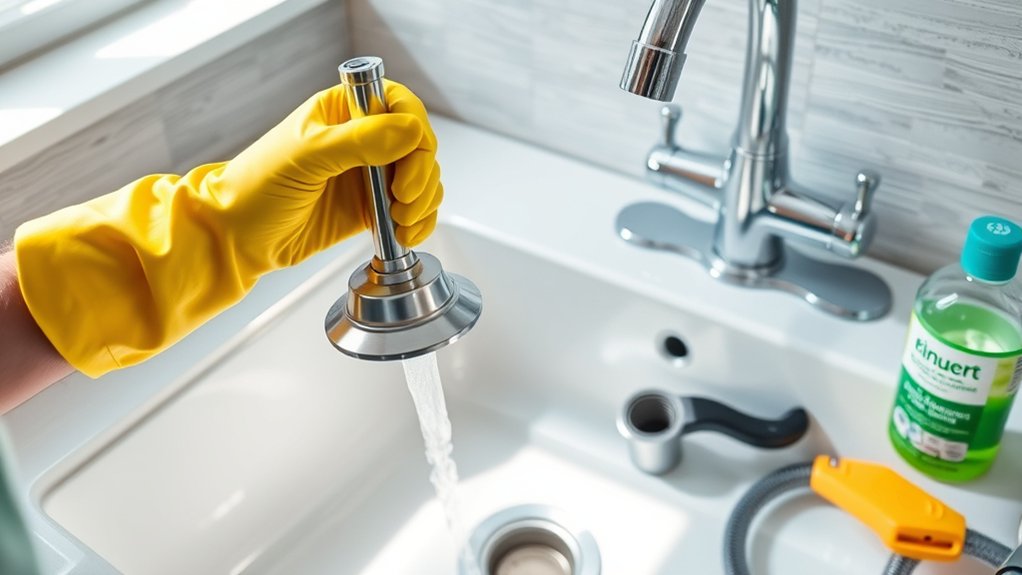
10 Easy Steps to Unclog the Kitchen Sink
A clogged kitchen sink can bring meal prep and cleanup to a frustrating halt. If you’re struggling to get the water flowing again, you’re not alone—many people deal with stubborn sink clogs. These 10 easy steps to unclog the kitchen sink can help you find the right solution.
To unclog your kitchen sink, first identify the blockage and clear any visible debris with gloves and tools. Pour boiling water carefully, then flush the drain with baking soda followed by vinegar to loosen clogs.
Remove and clean the sink stopper, and use a drain snake or wire hanger for deeper blockages. Don’t forget to check and clean the P-trap.
Adopt simple daily habits to prevent future clogs, and know when it’s time to call a professional. There’s more to mastering these steps effectively.
Key Takeaways
- Remove visible debris from the drain using gloves and tools like tweezers or pliers to prevent pushing clogs deeper.
- Pour boiling water or a baking soda and vinegar mixture down the drain to naturally dissolve grease and loosen blockages.
- Use a plunger with a tight seal and vigorous push-pull motions to dislodge stubborn clogs effectively.
- Detach and clean the P-trap to clear trapped debris and restore smooth drainage.
- Employ a drain snake or wire hanger to reach and break up deep clogs beyond the trap.
Find Out What’s Blocking Your Kitchen Sink

How do you know what’s causing your kitchen sink to clog? Start by observing how water drains. If it’s slow or backs up, something’s blocking the pipe.
Kitchen maintenance begins with identifying the problem. You won’t want to jump straight into using plumbing tools without knowing what’s wrong.
Common culprits include food scraps, grease buildup, or soap residue lodged deeper in the drain. Before grabbing any equipment, check for signs like unpleasant odors or gurgling sounds, which hint at a clog.
With this info, you’ll better understand whether to use a plunger, drain snake, or call a pro. Keeping your kitchen sink clear is easier when you pinpoint the blockage early.
Proper kitchen maintenance saves you from costly repairs and messy situations, so take a moment to assess the signs. That way, you’ll handle the clog effectively and keep your sink flowing smoothly.
Clear Visible Debris From the Drain Opening

Look for any visible debris around the drain opening. Put on gloves, then carefully remove the blockage. Take your time so you don’t push the clog farther down.
Identify Visible Blockages
Before diving into more complex fixes, check the drain opening for any visible blockages. Your kitchen design might affect how easily you spot these clogs. Use basic plumbing tools like a flashlight or tweezers to inspect and remove debris.
Here’s a quick guide to identify common blockages:
| Blockage Type | Appearance | Recommended Tool |
|---|---|---|
| Food scraps | Small bits, sticky | Tweezers |
| Grease buildup | Oily, slippery layer | Hot water, cloth |
| Soap scum | White, chalky film | Scraper |
| Hair | Tangled strands | Tweezers |
| Foreign objects | Unusual shapes | Pliers or hook |
Carefully removing these visible blockages improves flow and saves you time before using advanced plumbing tools.
Use Gloves For Safety
Wearing a pair of sturdy gloves is essential when clearing visible debris from your kitchen sink drain. Protective gear not only shields your hands from sharp objects like broken glass or metal but also prevents contact with harmful bacteria and chemicals lurking in the drain.
Before you start, put on gloves that fit well to maintain dexterity and avoid accidents. Taking these safety precautions reduces the risk of cuts, infections, and skin irritation.
Remember, the gloves act as a barrier between your skin and potential hazards, so never skip this step. By prioritizing protective gear, you create a safer environment for yourself while tackling the clog.
Always keep your gloves on until you’re completely done with clearing any debris near the drain opening.
Remove Debris Carefully
With your gloves securely on, you can now focus on removing any visible debris from the drain opening. Carefully pick out bits of food, hair, or gunk that could be blocking the flow.
Proper debris disposal is essential to avoid pushing clogs deeper. Use a small tool or your fingers to gently clear the area without damaging the drain. Here’s a quick guide to effective cleaning techniques for debris removal:
| Debris Type | Recommended Tool | Disposal Method |
|---|---|---|
| Food scraps | Tweezers or fingers | Trash bin |
| Hair | Needle-nose pliers | Wrap in tissue, trash |
| Grease buildup | Paper towel | Dispose in trash |
Following these steps guarantees you clean the drain opening efficiently and prevent further clogging.
Use Boiling Water to Loosen Kitchen Sink Clogs

If your kitchen sink drain feels sluggish, pouring boiling water down it can help break up grease and soap buildup quickly. Boiling water melts the fats and dissolves residues that often cause slow drainage. To do this safely, boil a kettle or large pot of water, then carefully pour it directly into the drain in stages, giving it time to work between pours. Avoid pouring boiling water if you have PVC pipes, as the heat might damage them.
Regular use of boiling water is an effective clog prevention method. By flushing your sink weekly with boiling water, you minimize the chance of buildup forming and keep your pipes flowing smoothly. This simple step helps maintain your kitchen sink’s drainage without harsh chemicals. Remember, boiling water is a natural, inexpensive way to keep clogs at bay and extend the life of your plumbing.
Flush the Drain With Baking Soda and Vinegar
Pour baking soda down the drain to help loosen grease and grime. Then add vinegar—the fizzing reaction can help loosen stubborn clogs. It’s a simple, natural option that avoids harsh chemicals.
Baking Soda Benefits
Two common household ingredients—baking soda and vinegar—can work wonders when it pertains to unclogging your kitchen sink. Baking soda benefits go beyond its role in baking; it’s a powerful natural cleaning agent that helps break down grime and neutralize odors in your drain.
When you pour baking soda down the sink, it clings to the buildup inside the pipes, loosening debris and grease. This makes it easier to flush out blockages without harsh chemicals.
Plus, baking soda is non-toxic and eco-friendly, so it’s safe for your pipes and the environment. Using baking soda as part of your unclogging routine not only clears your sink but also keeps it smelling fresh.
It’s an easy, affordable way to maintain a clean, flowing drain.
Vinegar Reaction Process
When baking soda meets vinegar in your drain, they create a fizzy reaction that helps break down stubborn clogs. This is vinegar chemistry at work: acetic acid in vinegar reacts with baking soda’s sodium bicarbonate, producing carbon dioxide bubbles.
These bubbles agitate and loosen debris trapped in the pipes. To maximize effectiveness, pour baking soda down the drain first, then add vinegar immediately after.
Reaction timing matters because the fizzing starts right away and lasts a few minutes. Letting the mixture sit for 15-30 minutes allows it to work through the clog.
Afterward, flush the drain with hot water to clear away loosened particles. By understanding the vinegar reaction process and its timing, you can easily maintain a clear kitchen sink without harsh chemicals.
Remove and Clean the Sink Stopper to Clear Clogs
Although it might seem simple, removing and cleaning the sink stopper is a crucial step to clear hidden clogs. Start by locating the sink stopper under the sink; you’ll usually find a pivot rod connected to it.
Removing and cleaning the sink stopper is key to clearing hidden clogs and improving drainage.
Loosen the nut holding the pivot rod in place, then carefully pull out the stopper from the drain. Be prepared: hair and debris often accumulate on the stopper, causing blockages.
Use appropriate cleaning tools like an old toothbrush, a small wire brush, or even a cloth to scrub away grime and buildup from the stopper and the drain opening. Rinse the stopper thoroughly under warm water to wash off loosened debris.
Once cleaned, reinsert the stopper by reversing the removal steps, making sure the pivot rod is securely fastened. This simple maintenance step can considerably improve your sink’s drainage and prevent future clogs.
Use a Plunger to Dislodge Stubborn Clogs
Choose the right plunger—a cup plunger works best for sinks. Place it firmly over the drain, then pump quickly and forcefully to loosen the clog. If it doesn’t clear on the first try, give it a few more pumps.
Choosing The Right Plunger
Selecting the right plunger can make all the difference in clearing a stubborn kitchen sink clog. You’ll want to evaluate plunger types: a cup plunger works best for flat surfaces like sinks. Proper plunger maintenance, like cleaning after use and storing it dry, guarantees it stays effective. Knowing the right plunger helps you tackle clogs faster and with less frustration.
| Plunger Type | Emotion Evoked |
|---|---|
| Cup Plunger | Confidence |
| Flange Plunger | Assurance |
| Accordion Plunger | Determination |
| Maintenance Tips | Preparedness |
Choosing well and maintaining your plunger gives you control over the clog, making the task less intimidating and more manageable.
Proper Plunging Technique
When plunging your kitchen sink, creating a tight seal around the drain is essential to generating the necessary pressure to dislodge clogs. Start by covering the sink’s overflow hole with a wet cloth to guarantee maximum suction.
Position the plunger so the cup fully covers the drain, then push down and pull up vigorously without breaking the seal. Using plunger accessories like flange attachments can help improve the seal on different drain types.
Remember, consistent pressure is key to loosening stubborn blockages. After plunging, rinse the plunger thoroughly and store it properly to prevent bacteria buildup.
Regular plunger maintenance, including cleaning and checking for cracks, will keep it effective and extend its lifespan, making certain you’re always ready to tackle future clogs quickly and efficiently.
When To Repeat Plunging
After using the proper plunging technique, you might find the clog isn’t fully cleared on the first try. When this happens, don’t hesitate to repeat plunging several times, allowing a few seconds between attempts for water to settle.
Persistent clogs often need multiple plunges to break up debris completely. If you notice a lingering drain odor, it could signal trapped residue, so repeating plunging is vital to clear it out.
Remember to check your plunger for damage before each use. Proper plunger maintenance ensures it creates a strong seal and works effectively.
If repeated plunging doesn’t improve flow or eliminate odors after several tries, it’s time to contemplate alternative methods or call a professional. Staying persistent with plunging often solves stubborn clogs quickly.
Clear Deep Clogs With a Drain Snake or Wire Hanger
If a plunger doesn’t clear the clog, you’ll need to reach deeper with a drain snake or a wire hanger. These tools help you break up or pull out stubborn blockages that sit further down the pipe. Using them not only unclogs your sink but also supports effective drain maintenance and pipe inspection, preventing future issues.
Here’s how to proceed:
- Insert the drain snake or straightened wire hanger gently into the drain.
- Rotate or twist the tool to snag or break up the clog.
- Pull the tool out carefully, removing debris caught on it.
- Run hot water to flush remaining particles.
- Repeat if necessary until water flows freely.
Regular use of a drain snake during pipe inspection helps you stay ahead of buildup, ensuring your kitchen sink stays clear and functional.
Check and Clean the P-Trap Under Your Sink
One key step to unclog your kitchen sink is to check and clean the P-trap under the sink. The P-trap is the curved pipe that holds water, preventing sewer gases from entering your kitchen.
Over time, it can collect debris, grease, and food particles that cause blockages. Start by placing a bucket underneath to catch any water.
Then, loosen the slip nuts on both ends of the P-trap using adjustable pliers or by hand if possible. Remove the P-trap carefully and inspect it thoroughly for clogs or buildup.
This P trap inspection is essential for effective pipe maintenance and keeping your drainage flowing smoothly. Clean out any debris using a brush or rag, then rinse the pipe with water before reassembling.
Make sure the slip nuts are tightened securely to avoid leaks. Regular P trap inspection and cleaning can save you from bigger plumbing issues down the line.
Prevent Kitchen Sink Clogs With Simple Daily Habits
Cleaning the P-trap helps clear existing blockages, but preventing clogs from forming in the first place saves you time and hassle. You can protect your kitchen sink by adopting simple daily habits that align with good kitchen design and efficient plumbing maintenance.
Here’s what you can do:
- Avoid pouring grease or oil down the drain; let it solidify and dispose of it in the trash.
- Use a drain strainer to catch food scraps and clean it regularly.
- Run hot water for 30 seconds after each use to flush away debris.
- Limit what you put down the garbage disposal, avoiding fibrous or starchy foods.
- Regularly flush drains with a mixture of baking soda and vinegar to break down buildup.
When to Call a Professional Plumber for Help
While many kitchen sink clogs can be fixed with simple DIY methods, you should call a professional plumber when the blockage persists despite your efforts or when you notice signs of a more serious plumbing issue. If water drains slowly, gurgles, or backs up repeatedly, it’s time to seek a professional inspection. Persistent clogs might indicate deeper problems in your pipes that DIY fixes can’t resolve.
Additionally, if you detect foul odors, leaks under the sink, or water damage on cabinets or floors, don’t wait. These could signal structural damage caused by unresolved plumbing issues. A licensed plumber has the tools and expertise to diagnose problems accurately and prevent costly repairs down the line.
Frequently Asked Questions
Can Chemical Drain Cleaners Damage My Kitchen Pipes?
Yes, chemical drain cleaners can damage your kitchen pipes. The strong chemical reactions they cause can lead to pipe corrosion, especially if you use them frequently or leave them sitting too long. Over time, this corrosion weakens your pipes, increasing the risk of leaks or bursts.
Instead of risking damage, consider safer alternatives like natural remedies or mechanical methods to clear clogs and protect your plumbing system.
How Often Should I Clean My Kitchen Sink Drain?
Don’t wait until the cows come home to clean your kitchen sink drain—doing it monthly keeps problems at bay. Stick to a drain maintenance schedule that fits your usage, and schedule a plumbing inspection every six months to catch issues early.
Regular cleaning prevents buildup, guarantees smooth drainage, and extends your pipes’ life. Staying proactive means you won’t face unexpected clogs or costly repairs down the line.
Are There Eco-Friendly Alternatives to Baking Soda and Vinegar?
Yes, you can use biodegradable solutions like enzyme-based drain cleaners that break down organic matter naturally without harsh chemicals. Natural remedies such as lemon juice mixed with salt or hot water with a bit of castile soap also work well. These options are gentle on your pipes and the environment, so you won’t harm your plumbing or local waterways. Switching to these eco-friendly methods helps you maintain a clean sink sustainably.
What Tools Are Safest for DIY Drain Cleaning?
Think of your clogged drain as a stubborn lock, and your tools as the keys. For safe DIY drain cleaning, you’ll want to master plunger techniques—using steady, rhythmic pushes to create suction that loosens blockages.
Drain snake methods work like threading a needle, carefully twisting and pulling debris free. Both tools let you tackle clogs without harsh chemicals, keeping your pipes and peace of mind intact. Just take it slow and steady!
Can Clogged Sinks Cause Bad Odors in the Kitchen?
Yes, clogged sinks can definitely cause bad odors in your kitchen. When debris and grease build up, they become smell sources that emit unpleasant odors. To tackle this, you should focus on odor prevention by regularly cleaning your drain and avoiding letting food scraps go down the sink. Using safe tools to clear blockages promptly also helps keep those smells from developing and keeps your kitchen smelling fresh.
Conclusion
Unclogging your kitchen sink is like untangling a stubborn knot—once you know the steps, it’s a breeze. By tackling blockages bit by bit, you’ll restore the smooth flow and keep your kitchen humming happily.
Remember, a little daily care goes a long way in preventing future clogs. But if the problem feels like a wild beast you can’t tame, don’t hesitate to call in a pro. Your sink will thank you!
Follow these 10 easy steps to unclog your kitchen sink and keep it flowing smoothly.