How to Change a Kitchen Faucet in 7 Easy Steps
A leaky or outdated kitchen faucet can make everyday tasks frustrating, and choosing a replacement can feel overwhelming. You’re not alone—many people struggle to find the right faucet and figure out how to install it.
This guide to how to change a kitchen faucet in 7 easy steps will help you get started.
To change your kitchen faucet in seven easy steps, first pick a faucet that suits your style and needs. Gather tools like an adjustable wrench, screwdriver, and plumber’s tape.
Shut off your water supply completely, then disconnect and remove the old faucet carefully. Prep the sink and plumbing for the new faucet, then install it securely, connecting all lines tightly.
Finally, test for leaks and smooth water flow. Keep going to uncover helpful tips for a flawless faucet replacement.
Key Takeaways
- Turn off water supply valves and open the faucet to drain remaining water before removal.
- Disconnect water lines and remove mounting nuts to lift out the old faucet carefully.
- Prepare new faucet components, secure it to the sink, and connect water supply lines tightly.
- Turn water back on, test for leaks and proper water flow, including hot and cold streams.
- Inspect joints for leaks, apply sealant or tighten connections as needed to fix minor leaks.
Choosing the Right Replacement Kitchen Faucet

How do you pick the perfect replacement kitchen faucet? Start by considering the faucet material since it affects durability and maintenance. Stainless steel offers a sleek look and resists corrosion, while brass provides classic appeal and longevity.
Chrome finishes are shiny and budget-friendly but might show water spots more easily. Next, explore the style options to match your kitchen’s vibe. Whether you want a single-handle faucet for ease or a double-handle design for precise temperature control, there’s a style that fits your needs.
Pull-down or pull-out sprayers add flexibility and convenience for washing dishes or filling pots. Also, think about the mounting type. Deck-mounted faucets are common, but wall-mounted options save counter space.
Tools You’ll Need to Change Your Kitchen Faucet

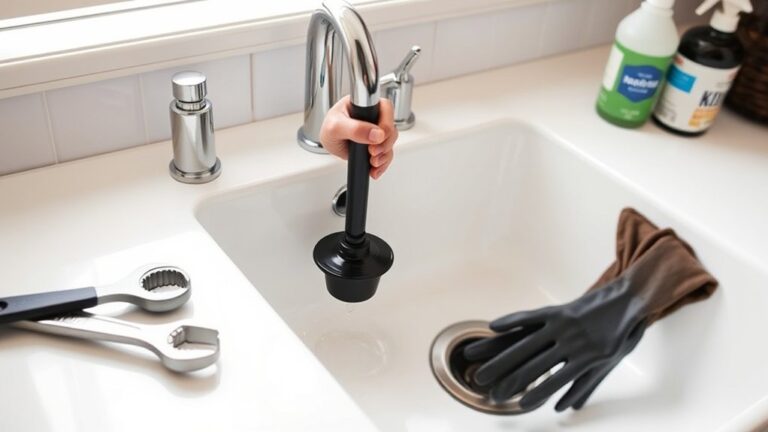
You’ll need a few essential tools to change your kitchen faucet efficiently and avoid common frustrations. Start with an adjustable wrench and basin wrench—these help you loosen nuts in tight spaces. A screwdriver set, including both flathead and Phillips, is vital for removing mounting hardware. Don’t forget plumber’s tape to seal threaded connections, preventing leaks. A bucket and towels come in handy for catching drips and keeping your workspace dry.
When choosing your replacement faucet, consider faucet finishes that complement your kitchen’s style and match existing fixtures. High-quality finishes resist tarnishing and corrosion, making your work last longer. Also, pay attention to brand reputation; trusted brands often provide clearer instructions and better customer support, easing your installation process.
Having these tools ready will make swapping your old faucet smoother, letting you enjoy your kitchen upgrade without unnecessary delays or damage.
How to Turn Off Your Water Supply Safely

Before you start removing your old faucet, make sure to shut off the water supply to prevent leaks and water damage. Locate the shutoff valves under your sink—these control the water flow specifically to your kitchen faucet. Turn both the hot and cold water valves clockwise until they’re fully closed. If you don’t find individual shutoff valves or they’re stuck, you’ll need to turn off the main water supply for the entire house.
After closing the valves, open the faucet to drain any remaining water from the lines. This step is vital for water safety and helps avoid spills or pressure buildup while you work. Double-check that no water flows once the faucet is open; this confirms the supply is completely off.
Removing Your Old Kitchen Faucet
Wondering where to begin with removing your old kitchen faucet? Start by disconnecting the water lines from the faucet’s base. Use an adjustable wrench to loosen the nuts, but be careful not to damage the faucet material, especially if it’s brass or chrome.
Next, remove any mounting nuts or screws holding the faucet in place underneath the sink. You might need a basin wrench for tight spots. Once loose, lift the faucet out carefully, keeping an eye out for any old putty or sealant that may stick to your sink.
If your faucet has an ergonomic design, it might have extra components like pull-out sprayers. Disconnect these gently to avoid damage. Keep all parts and hardware organized; you may need them for reference or reuse.
Removing your old faucet sets the stage for a smooth installation of the new one, so take your time and make certain everything is clean and ready before moving forward.
Preparing Your Sink and Plumbing for Installation
With your old faucet removed and the area cleared, it’s time to prepare your sink and plumbing for the new installation. Start by thoroughly cleaning the sink area using mild soap and water to remove any grime or residue.
This step is vital for a secure fit and helps prevent future leaks. Use cleaning tips like a soft brush to reach tight spots around the mounting holes.
Next, inspect the plumbing for any signs of corrosion or damage. Replace worn-out washers or damaged supply lines to guarantee the best faucet performance.
Proper faucet maintenance begins here, so take your time to tighten loose connections and clear any mineral buildup inside the supply valves.
Finally, dry the surface completely to avoid moisture interfering with the installation. Preparing your sink and plumbing carefully will save you headaches later and extend the life of your new faucet.
Now, you’re ready to move on to installing your new kitchen faucet.
Installing Your New Kitchen Faucet
Now that your sink and plumbing are ready, you can assemble the faucet components. Next, connect the water supply lines and make sure they’re secure. Finally, fasten the faucet to the sink to complete the installation.
Preparing Faucet Components
How do you guarantee a smooth installation of your new kitchen faucet? Start by preparing all faucet components carefully. First, check the faucet finishes to ensure they match your kitchen’s style and existing fixtures. This not only improves aesthetics but also prevents surprises during installation.
Next, lay out all mounting hardware included with your faucet—nuts, washers, and gaskets—and confirm you have everything needed. Organize them by type to speed up the process.
Inspect the mounting hardware for any defects or missing parts before you begin. Proper preparation helps avoid delays and frustration. When everything is ready, you’ll have a clear path to installing your faucet securely and efficiently, setting the stage for connecting water supply lines in the next step.
Connecting Water Supply Lines
Once you’ve prepared all the faucet components, it’s time to connect the water supply lines to your new kitchen faucet. First, make certain the water supply is turned off to avoid leaks.
Attach the supply lines to the corresponding hot and cold valves under the sink, matching the connectors carefully. Use a wrench to tighten the connections securely, but don’t overtighten, as it can damage the fittings or affect water pressure.
Check that the supply lines are compatible with your faucet finishes to maintain a clean, professional look. Once connected, turn the water back on slowly and test for any leaks.
Properly connected supply lines ensure steady water pressure and prevent future issues, giving your kitchen faucet a smooth, reliable performance.
Securing Faucet To Sink
After connecting the water supply lines, you’ll secure the faucet to the sink to guarantee it stays firmly in place. Begin by applying sink sealing around the faucet base to prevent leaks and water damage. Position the faucet in the mounting holes, ensuring it’s aligned correctly.
Underneath the sink, slide the faucet mounting hardware onto the faucet’s threaded shanks. Tighten the mounting nuts by hand first, then use a basin wrench to firmly secure them without overtightening. Check that the faucet is stable and properly sealed against the sink surface.
This faucet mounting step is essential for a leak-free, sturdy installation. Finally, wipe away any excess sealant and confirm everything is secure before turning the water back on.
Testing Your New Faucet and Fixing Common Issues
Once your new faucet is installed, turn on the water and check the flow and temperature. While it’s running, look for leaks around the connections or base. If you notice any drips or weak flow, take care of the issue right away to prevent bigger problems.
Checking Water Flow
How can you be sure your new kitchen faucet is working properly? Start by turning on the water supply and observing the water flow. Check the water pressure to ensure it’s strong and consistent—too low, and you might have a supply issue; too high, and it could damage your plumbing.
Next, assess the flow rate by running the faucet fully open. The water should flow smoothly without sputtering or irregular spurts. If the flow seems weak, check the aerator for debris or buildup that might restrict water.
Also, verify that both hot and cold water streams function correctly. By carefully checking water pressure and flow rate, you’ll confirm your faucet performs as expected and catch minor issues before they escalate.
Resolving Leakage Problems
Checking the water flow gives you a good sense of your faucet’s performance, but spotting leaks requires a closer look. Start your leak detection by inspecting joints and connections thoroughly. If you find any drips, turn off the water and apply sealant carefully to the affected areas. After sealant application, retest to ensure the leak is gone.
| Leak Location | Possible Cause | Fix Method |
|---|---|---|
| Base of faucet | Loose connections | Tighten & seal |
| Under sink pipes | Worn washers | Replace washers |
| Spray hose joints | Cracked seals | Apply sealant & test |
Frequently Asked Questions
Can I Change a Kitchen Faucet Without Shutting off the Main Water Supply?
You generally shouldn’t change a kitchen faucet without shutting off the main water supply. If you don’t, water pressure will cause leaks or sprays, making the job messy and difficult.
Sometimes, you can shut off the valves under the sink instead, but only if they’re compatible with your pipes and fully functional. Always confirm pipe compatibility and control water pressure to avoid damage or flooding during the replacement process.
How Do I Choose a Faucet Finish That Matches My Kitchen Decor?
Like picking a quill in the age of keyboards, choosing a faucet finish that suits your kitchen decor starts with understanding faucet styles and finish durability.
Match the finish to your existing hardware. Brushed nickel complements modern setups, while oil-rubbed bronze suits rustic themes.
Consider how durable the finish is against water spots and scratches. Trust your eye, but also think about how the finish holds up daily to keep your kitchen looking sharp.
What Should I Do if My Faucet Leaks After Installation?
If your faucet leaks after installation, start by tightening all connections to stop the drip. If it still leaks, check for damaged washers or O-rings and replace them.
You can also apply sealant around joints to improve leak repair. Make certain to turn off the water supply before working.
If leaks persist, consider consulting a plumber to avoid water damage and guarantee your faucet is properly sealed and secure.
Are There Eco-Friendly Kitchen Faucets Available?
Yes, you can find eco-friendly kitchen faucets that use eco friendly materials like recycled metal and BPA-free plastics. These faucets often include water saving features such as aerators and flow restrictors, helping you reduce water use without sacrificing performance.
When you choose one, you’ll not only save water but also lower your utility bills and reduce your environmental impact. Look for certifications like WaterSense to guarantee the faucet meets eco-friendly standards.
How Often Should I Replace My Kitchen Faucet?
Faucet lifespan frequently falls between 15 to 20 years, but faulty fixtures force faster fixes. You should replace your faucet when you spot replacement indicators like leaks, low water pressure, or persistent corrosion. Don’t delay dealing with dripping drains or damaged parts, as these signs signal it’s time for a timely transformation. Paying close attention to these clues helps you maintain a smoothly functioning sink and prevents plumbing problems from piling up.
Conclusion
Changing a kitchen faucet is easier than you might think. With a few tools and these simple steps, you can upgrade your kitchen’s look and functionality. Many homeowners tackle small plumbing projects themselves, and you can too.
Turn off the water supply, follow the steps, and enjoy your new kitchen faucet!