10 Steps to Increase Water Pressure in Your Kitchen Sink
A weak kitchen sink stream can make everyday tasks like washing dishes and rinsing produce frustrating. You’re not alone—many people struggle with low water pressure and want a simple way to get a stronger flow. These 10 steps to increase water pressure in your kitchen sink can help you find the cause and choose the right fix.
To improve your kitchen sink’s water pressure, start by checking and cleaning your faucet and aerator to remove clogs. Confirm all water supply valves are fully open and clear mineral buildup with vinegar.
Adjust or replace the pressure regulator if needed, and consider upgrading to high-pressure faucets or supply lines. Adding a booster pump can further boost flow.
If pressure issues persist, troubleshooting or professional help may be your best bet. Here’s how you can tackle each step effectively.
Key Takeaways
- Clean or replace the faucet aerator to remove mineral buildup and improve water flow.
- Ensure all water supply valves are fully open and free from leaks or obstructions.
- Replace old or corroded supply lines to prevent blockages and enhance pressure.
- Adjust or replace the water pressure regulator to maintain optimal pressure between 40-60 psi.
- Install a water pressure booster pump or consult a plumber for persistent low-pressure issues.
Check Your Kitchen Sink Faucet for Clogs
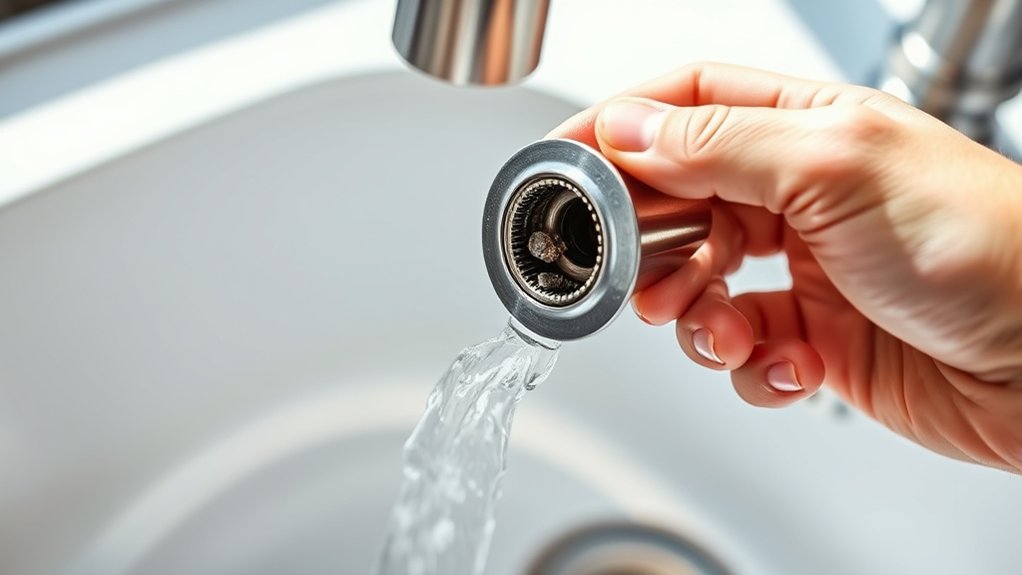
Before you assume the problem lies deeper in your plumbing, check your kitchen sink faucet for clogs. Mineral deposits or debris can build up inside the faucet, especially if you have hard water. These blockages reduce water flow and make your sink frustrating to use. Different faucet materials, like brass or stainless steel, can attract and hold deposits differently, so consider your faucet’s make when inspecting it.
Start by turning off the water supply and removing the faucet handle or spout if possible. Look inside for visible buildup and use a small brush or cloth to clear away grime. You might also soak parts in vinegar to dissolve minerals safely without damaging the faucet’s finish.
Once cleaned, reassemble everything and test the water flow. If it improves, you’ve solved a common problem without needing expensive repairs. Keeping the faucet materials in mind helps you choose the best cleaning approach and maintain strong water flow for years to come.
Clean or Replace the Faucet Aerator to Boost Water Pressure
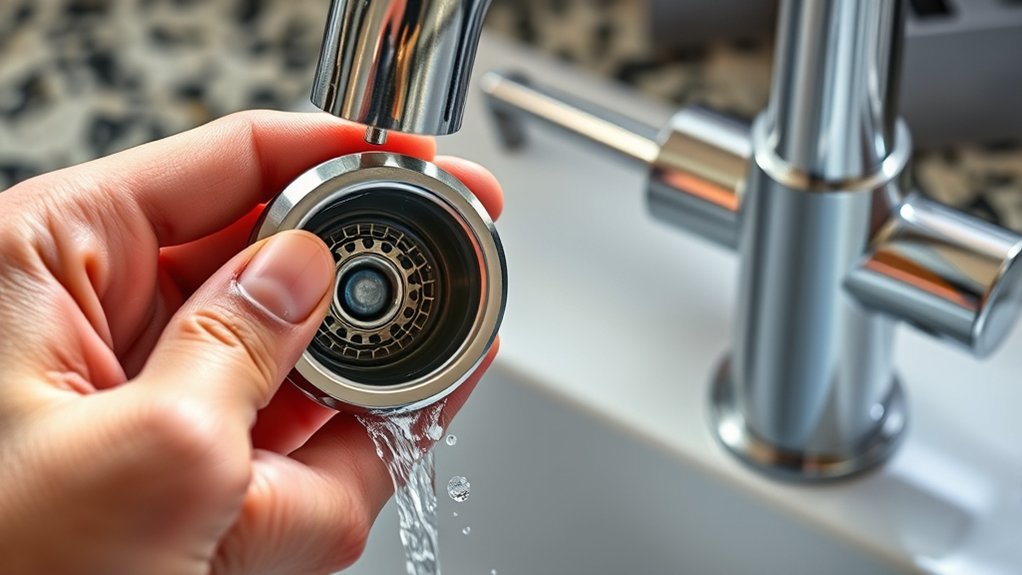
If your water pressure remains low after checking for clogs, you should clean or replace the faucet aerator. The aerator is a small screen at the end of your faucet that mixes air with water to reduce splashing and conserve water.
Over time, mineral deposits and debris build up, restricting water flow and lowering pressure.
Start faucet maintenance by unscrewing the aerator carefully. Soak it in vinegar for about 30 minutes to dissolve mineral buildup. Use a small brush or toothpick to remove any stubborn debris.
Begin by gently unscrewing the aerator and soaking it in vinegar to clear mineral buildup.
Rinse it thoroughly before reattaching. If cleaning doesn’t improve pressure, consider replacing the aerator with a new one that fits your faucet model.
Regular aerator cleaning not only boosts water pressure but also extends your faucet’s lifespan. Incorporate this simple step into your routine faucet maintenance to keep your kitchen sink running smoothly and efficiently.
Make Sure Your Water Supply Valves Are Fully Open
First, find your main water valve and the valves under your kitchen sink. Turn each one fully open to allow the best water flow. Even a partly closed valve can noticeably reduce water pressure.
Locate Main Water Valve
To boost your kitchen sink’s water pressure, you need to locate the main water valve and verify all supply valves are fully open. The main valve controls the water flow to your entire home, so it’s vital it’s completely turned on.
Usually, you’ll find the main valve near your water meter or where the main water line enters your house. Once located, check that the valve handle is parallel to the pipe, indicating it’s fully open.
If it’s partially closed or perpendicular, water flow to your kitchen sink and the rest of your home can be restricted. Opening the main valve fully ensures maximum water pressure, which can considerably improve your kitchen sink’s performance. Double-check this step before moving on to other adjustments.
Check Under-Sink Valves
Two valves beneath your kitchen sink control the direct water flow to your faucet, so make certain both the hot and cold water supply valves are fully open.
During your under sink inspections, check these valves carefully for any signs of wear, corrosion, or leaks that could restrict water pressure. Valve maintenance is essential; if you find any buildup or debris, clean the valves to guarantee smooth operation.
Sometimes, valves may look open but aren’t turned all the way, so double-check their positions. Regularly inspecting these valves helps identify issues early, preventing reduced water pressure or potential damage.
Taking a few minutes for proper valve maintenance can greatly improve your kitchen sink’s water flow and avoid costly repairs in the future.
Fully Open All Valves
Although it might seem obvious, guaranteeing all water supply valves are fully open is an essential step in boosting your kitchen sink’s water pressure. Sometimes, valves under the sink or at the main shutoff aren’t completely open, restricting water flow and reducing pressure.
Take a moment for valve maintenance by turning each valve counterclockwise until it stops. This simple action improves water flow regulation, allowing water to move freely through your pipes.
If you encounter resistance or leaks, address these issues promptly to avoid further pressure drops. Regularly checking and fully opening all valves ensures your kitchen sink receives maximum water pressure, making tasks easier and more efficient.
Don’t overlook this straightforward step when troubleshooting low water pressure.
Remove Mineral Buildup to Improve Water Pressure
When mineral deposits accumulate inside your kitchen faucet or aerator, they can drastically reduce water flow and pressure. To fix this, start by unscrewing the aerator at the tip of your faucet. Soak it in a mixture of equal parts white vinegar and water for about 30 minutes to dissolve mineral buildup.
After soaking, use an old toothbrush to scrub away any remaining deposits gently. Rinse the aerator thoroughly with water before screwing it back onto your faucet.
If you notice mineral buildup inside the faucet itself, you might need to flush the system by removing the faucet and running water through the pipes to clear debris. Regularly cleaning your faucet and aerator prevents mineral buildup and helps maintain steady water flow.
This simple step can markedly improve your kitchen sink’s water pressure without costly repairs or replacements.
Check and Adjust Your Water Pressure Regulator
First, locate your water pressure regulator. It’s usually near the main water shutoff valve. Once you find it, you can adjust the setting to increase the pressure. Make small changes, and test the water flow after each one.
Locate The Pressure Regulator
Since inconsistent water pressure often stems from your home’s pressure regulator, locating and adjusting this device can quickly improve your kitchen sink’s flow. Start by finding the main water line entering your home, usually near the water meter or where the main shutoff valve is located.
The pressure regulator is typically a bell-shaped or cylindrical device attached to the pipe. Look for a pressure gauge nearby, which helps you monitor water pressure accurately.
Identifying the regulator is vital before any regulator adjustment, ensuring you adjust the right component. If you don’t see a pressure regulator, your home might not have one installed, and you may need to consult a professional to add one.
Properly locating this device sets the stage for effective water pressure improvements.
Adjust Regulator Settings
Adjusting your water pressure regulator involves a few simple steps that can make a noticeable difference in your kitchen sink’s flow. First, locate the regulator, usually near your main water shutoff. Use a pressure gauge to measure the current water flow pressure. If it’s below 40 psi, you’ll want to increase it.
To adjust, loosen the lock nut on the regulator and turn the adjustment screw clockwise to raise pressure. After each turn, check the pressure gauges again to avoid over-pressurizing. Once the desired pressure is reached, tighten the lock nut.
| Pressure Gauge Reading (psi) | Water Flow Impact |
|---|---|
| Below 40 | Weak flow, low pressure |
| 40-60 | Excellent kitchen flow |
| 60-80 | Strong flow, no damage |
| Above 80 | Risk of pipe damage |
Replace Old or Corroded Water Supply Lines
Old or corroded water supply lines can markedly reduce your kitchen sink’s water pressure. To restore ideal flow, start by performing a thorough corrosion inspection on your existing supply lines. If you spot rust, cracks, or mineral buildup, it’s time for supply line replacement. Here’s how to do it effectively:
- Turn off the water supply valve under your sink to prevent leaks.
- Disconnect the old supply lines using an adjustable wrench, being careful not to damage fittings.
- Inspect the shutoff valve and faucet connections for corrosion or wear.
- Attach new, high-quality supply lines that fit your plumbing, then tighten securely.
Replacing old or corroded lines removes blockages and prevents leaks, considerably improving water pressure. Regular corrosion inspection and timely supply line replacement ensure your kitchen sink performs well without unnecessary hassle.
Install a High-Pressure Kitchen Faucet
Installing a high-pressure kitchen faucet can give you a stronger stream of water. Before choosing one, think about the spray settings, build quality, and whether it fits your sink.
Once you’ve found the right faucet, gather the necessary tools and follow the installation steps. The process is usually straightforward, and you may notice a difference in water flow afterward.
Benefits of High-Pressure Faucets
Installing a high-pressure kitchen faucet can transform your daily tasks by delivering a stronger, more consistent water flow. You’ll notice immediate improvements that make your kitchen experience more efficient and eco-friendly. Here are four key benefits:
- Improved cleaning power – A stronger stream helps rinse dishes and vegetables quickly.
- Water conservation – Many high-pressure faucets are designed as eco friendly fixtures, reducing water waste while maintaining flow.
- Time-saving – Faster water flow means less waiting, speeding up meal prep and cleanup.
- Enhanced durability – These faucets often come with better components, ensuring long-term performance and reliability.
Choosing the Right Faucet
Picking the right high-pressure faucet can make a significant difference in your kitchen’s water flow and overall functionality. When choosing, focus on faucet material; stainless steel and brass offer durability and resist corrosion, ensuring consistent performance.
Avoid plastic parts that may weaken water pressure over time. Also, consider design aesthetics to match your kitchen’s style—sleek, modern faucets not only look great but often incorporate efficient aerators that boost pressure.
Opt for models with adjustable spray settings to control water flow according to your needs. Remember, a well-designed faucet balances form and function, enhancing both pressure and your kitchen’s appeal.
Installation Tips and Tools
Before you start, gather the essential tools like an adjustable wrench, plumber’s tape, and a basin wrench to make the installation smoother. Installing a high-pressure kitchen faucet not only boosts water flow but can also promote water conservation when you choose eco friendly fixtures. Follow these steps:
- Turn off the water supply under the sink to avoid leaks.
- Remove the old faucet carefully using your wrench.
- Wrap plumber’s tape around the faucet threads to guarantee a tight seal.
- Securely install the new high-pressure faucet, tightening connections with a basin wrench.
Add a Water Pressure Booster Pump for Your Kitchen Sink
If your kitchen sink suffers from consistently low water pressure, adding a water pressure booster pump can provide an immediate and noticeable improvement. This device increases water flow by boosting pressure within your plumbing system, guaranteeing your faucet delivers a stronger stream. To start, choose a water pressure booster designed specifically for kitchen sinks to match your existing setup.
Pump installation typically involves connecting the booster directly to your water supply line under the sink. Make sure to turn off the main water valve before beginning your work. You’ll need basic tools like a wrench and Teflon tape for secure fittings. Carefully follow the manufacturer’s instructions to avoid leaks and ensure peak performance.
Once installed, test your sink to confirm the improved water pressure. Adding a water pressure booster pump is a practical solution that can greatly improve your kitchen sink’s functionality without extensive plumbing modifications.
Know When to Call a Professional Plumber
When your efforts to boost kitchen sink water pressure don’t work or you encounter complex plumbing issues, it’s time to call a professional plumber. They have the expertise to diagnose hidden problems and recommend solutions that align with water conservation goals and eco friendly fixtures.
Here are four clear signs you should reach out to a plumber:
- Persistent low water pressure despite basic fixes.
- Visible leaks or corrosion around pipes and fixtures.
- Need to upgrade to eco friendly fixtures to save water efficiently.
- Planning major plumbing changes that affect water flow or pressure.
Calling a professional ensures your kitchen sink pressure improves safely and effectively. Plus, they can help you adopt water-saving technologies that reduce waste without sacrificing performance.
Don’t hesitate to get expert help to maintain your plumbing system’s health and support sustainable water use.
Troubleshoot Common Water Pressure Problems in Your Kitchen Sink
Although low water pressure can be frustrating, you can often identify and fix common issues yourself. Start by checking the aerator on your kitchen faucet, as mineral buildup often restricts flow. Unscrew it, clean out debris, and soak it in vinegar to improve water pressure.
Low water pressure? Clean your faucet aerator by removing mineral buildup for improved flow and performance.
Next, inspect the shut-off valves under the sink; make sure they’re fully open. If your faucet has a cartridge, worn parts may cause low pressure. Replacing or cleaning the cartridge often helps.
Don’t forget to examine supply lines for kinks or leaks, which can reduce flow and waste water, defeating water conservation efforts. Regular faucet maintenance not only improves pressure but also extends your fixture’s life.
If you notice persistent issues after these steps, the problem might lie deeper in your plumbing system. Taking these troubleshooting steps first can save you time and money before calling a professional plumber.
Frequently Asked Questions
How Does Water Pressure Affect My Dishwasher Performance?
Water pressure directly impacts your dishwasher’s performance by controlling water flow into the machine. If the pressure is too low, your dishwasher won’t fill properly, leading to poor cleaning results.
On the other hand, if it’s too high, it could damage internal components. Pressure regulation ensures the water flow stays consistent, so your dishwasher runs efficiently and cleans your dishes thoroughly every time. You want balanced pressure for peak performance.
Can Low Water Pressure Cause Leaks in Plumbing Fixtures?
Back in the days of musketeers, you’d think low water pressure wouldn’t cause plumbing leaks, but it actually can. When water pressure drops, your fixtures might not seal properly, leading to slow drips or hidden leaks.
You’ve got to keep an eye on both pressure and leaks, because inconsistent water pressure stresses pipes and connections. So yes, low water pressure can definitely cause plumbing leaks, and you should address it quickly.
What Is the Ideal Water Pressure Range for a Kitchen Sink?
The ideal water pressure range for a kitchen sink is typically between 40 and 60 psi. You want enough water flow to wash dishes effectively without causing splashing or strain on your plumbing.
Pressure regulation is key to maintaining this balance, preventing damage from too-high pressure and ensuring steady flow. If your pressure’s outside this range, adjusting the regulator or consulting a plumber can help keep your sink working smoothly.
How Often Should I Inspect My Home’s Main Water Line?
Think of your main water line as the heart of your home’s hydration system—it needs regular checkups to keep things flowing smoothly. You should schedule a main line inspection at least once a year to catch any lurking issues before they burst like surprise storms.
Consistent water line maintenance helps prevent costly damage and guarantees steady pressure. Don’t wait for leaks to announce themselves; stay proactive and protect your home’s water health.
Do Water Softeners Impact Kitchen Sink Water Pressure?
Yes, water softeners can cause pressure reduction at your kitchen sink if they’re clogged or not maintained properly. They work by filtering minerals, which might slow water flow over time.
If you notice weaker pressure, check the softener’s settings and clean or replace its filters. Regular upkeep helps prevent pressure issues, ensuring your kitchen sink water pressure stays strong despite using a water softener.
Conclusion
By checking your faucet for clogs, cleaning or replacing the aerator, and opening supply valves fully, you’ll start to see better flow. Removing mineral buildup, adjusting your pressure regulator, and installing a high-pressure faucet will boost your water’s force.
Adding a booster pump, troubleshooting common issues, and knowing when to call a plumber will keep your kitchen running smoothly. Take these steps to increase water pressure in your kitchen sink, and enjoy a stronger, steady stream every time.