How Do You Unclog a Kitchen Sink in 10 Easy Steps?
A clogged kitchen sink can bring meal prep and cleanup to a frustrating halt. If you’re struggling with standing water or a slow drain, you’re not alone—many people deal with kitchen sink clogs.
This guide walks you through how to unclog a kitchen sink in 10 easy steps, with practical tips to make the job easier.
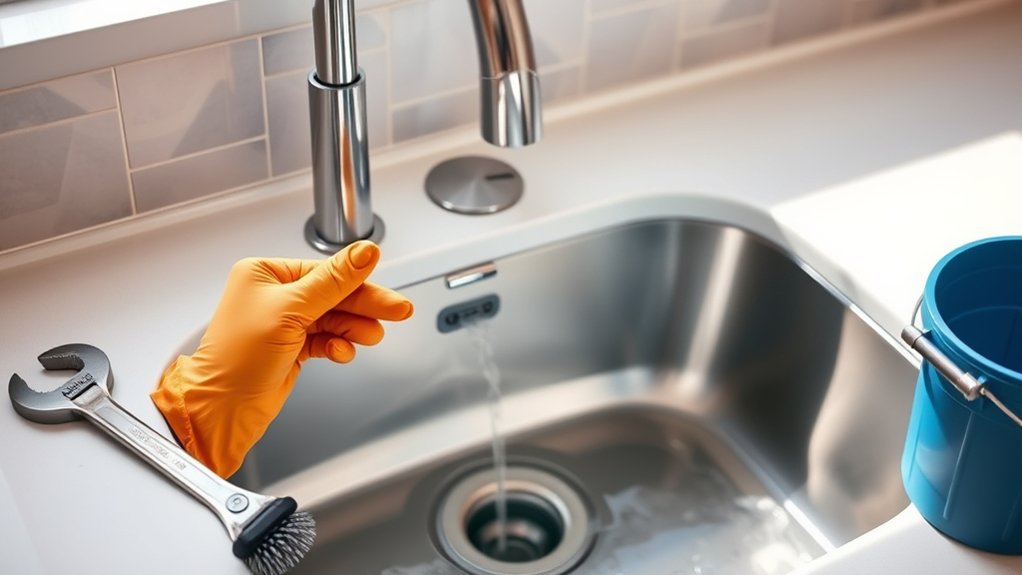
To unclog your kitchen sink in 10 easy steps, start by gathering tools like a plunger, wrench, bucket, and gloves. First, clear any visible debris from the drain.
Next, pour boiling water to soften grease, then add baking soda and vinegar to break down blockages. Use a plunger and, if needed, a drain snake to dislodge clogs.
Remove and clean the P-trap, then flush with hot water to test flow.
Stick to simple habits to prevent future clogs. Keep going to learn practical tips and tricks that’ll make the process easier.
Key Takeaways
- Clear visible debris from the drain opening using gloves, a flashlight, and tweezers to remove blockages.
- Use boiling water followed by baking soda and vinegar to soften and break down grease clogs.
- Employ a cup plunger to create suction and dislodge the clog with steady, controlled plunges.
- Remove and clean the P-trap by placing a bucket underneath, loosening slip nuts, and scrubbing debris away.
- Use a drain snake to reach and extract stubborn blockages deep within the drain pipe if necessary.
Gather Essential Tools and Supplies for Unclogging Your Kitchen Sink

Before you plunge into unclogging your kitchen sink, make sure you have all the essential tools and supplies on hand. Tackling DIY plumbing is much smoother when you’re prepared.
Start with a sturdy plunger designed for sinks, as it creates the suction needed to dislodge blockages. A plumber’s wrench will help you loosen pipes under the sink if you need to remove them.
Grab a bucket to catch any water or debris when working beneath the sink. You’ll also want a pair of rubber gloves to protect your hands and a flashlight to see into dark pipes.
Having a drain snake or auger can be a lifesaver for stubborn clogs deeper in the pipes. Finally, keep some mild cleaning supplies nearby for sink maintenance once the clog is cleared.
Gathering these tools upfront saves time and prevents frustration, making your kitchen sink unclogging a straightforward, efficient task.
Clear Visible Debris From Your Kitchen Sink Drain

Once you’ve gathered your tools, start by removing any visible debris from your kitchen sink drain. Use gloves to protect your hands and a flashlight to spot leftover food particles, grease, or small items causing the blockage.
Begin by clearing visible debris using gloves and a flashlight to locate hidden blockages in your kitchen sink drain.
Grab a pair of tweezers or needle-nose pliers to carefully extract any stubborn debris. Clearing this buildup is a vital step in kitchen cleaning that helps restore water flow and prevents odors.
Pay close attention to the drain stopper and its surrounding area, as gunk often accumulates there. Regular drain maintenance like this prevents clogs from worsening and saves you time and money in the long run.
After you’ve cleared out all visible debris, wipe the drain opening with a clean cloth to remove any residue. This simple step guarantees your kitchen sink drain is free from blockages and ready for the next part of the unclogging process.
Use Boiling Water to Soften Grease in Your Kitchen Sink

Pour boiling water slowly and carefully down your kitchen sink to soften grease and help clear a clog. Take care to avoid splashing. It’s a simple way to loosen buildup without using harsh chemicals.
Benefits of Boiling Water
Although grease buildup can stubbornly clog your kitchen sink, pouring boiling water down the drain can quickly soften and break it apart. Using boiling water in your kitchen maintenance routine prevents blockages, saves money on chemical cleaners, and protects your pipes from damage.
It’s a simple, eco-friendly way to keep your sink flowing smoothly.
| Benefit | Explanation |
|---|---|
| Effective Cleaning | Boiling water dissolves grease and food particles |
| Cost-Effective | Saves money on expensive drain cleaners |
| Pipe Protection | Avoids harsh chemicals that can corrode pipes |
Incorporating boiling water regularly helps you maintain a clear, odor-free drain without extra effort or harmful substances.
Proper Boiling Water Use
Boiling water works best when used correctly to tackle grease buildup in your kitchen sink. To guarantee effective grease removal, start by heating a full kettle or pot of water until it reaches a rolling boil.
Carefully pour the boiling water directly down the drain in stages, allowing it to work on softening the grease with each pour. Avoid pouring all the water at once to give it time to break down the buildup.
Use boiling water regularly to prevent grease from solidifying and causing clogs. Keep in mind that boiling water is most effective on fresh grease clogs rather than hardened blockages.
Break Down Blockages With Baking Soda and Vinegar
When stubborn gunk clogs your kitchen sink, baking soda and vinegar create a powerful, natural reaction that helps break down the blockage. Start by pouring about half a cup of baking soda directly into the drain. Follow this with a cup of white vinegar.
You’ll notice fizzing and bubbling—that’s the reaction working to loosen grime and debris. Let the mixture sit for 15 to 30 minutes.
This method is an excellent choice for eco friendly cleaning since it avoids harsh chemicals that can harm your pipes or the environment. After waiting, flush the drain with hot water to wash away loosened buildup.
Using baking soda and vinegar supports plumbing safety by reducing the risk of pipe corrosion and damage often caused by chemical drain cleaners. Repeat the process if necessary.
This simple, natural approach keeps your kitchen sink clear while protecting your plumbing and the planet.
Use a Plunger to Dislodge Kitchen Sink Clogs
Choose a cup plunger for the job—it works best on sinks. Before you start, make sure it forms a tight seal around the drain. Then plunge with steady, controlled pushes to help break up the clog.
Choosing The Right Plunger
Selecting the right plunger is key to clearing kitchen sink clogs quickly and effectively. You want a tool that creates a strong seal and matches your sink’s drain design. There are various plunger types, but not all work well for kitchen sinks.
Consider these points when choosing your plunger:
- Cup Plungers: Best for flat surfaces like kitchen sinks, offering excellent seal effectiveness.
- Flange Plungers: Designed for toilets, less effective in sinks due to shape.
- Material: Rubber plungers provide flexibility and better suction than plastic ones.
- Size: Choose a plunger large enough to cover the drain completely to maximize pressure.
Picking the right plunger guarantees you tackle the clog efficiently without damaging your sink.
Proper Plunging Technique
Although choosing the right plunger is essential, using it correctly makes all the difference in clearing your kitchen sink clog. To master the proper plunging technique, start by sealing the plunger’s cup tightly over the drain opening. If your sink has two basins, plug the other drain to create better suction.
Next, push the plunger down firmly, then pull up sharply without breaking the seal. Repeat this rhythm 15-20 times. The key plunging technique involves maintaining a consistent, strong seal and using forceful, controlled motions to dislodge the clog.
After plunging, quickly remove the plunger to allow water to flow freely. If the water drains slowly or remains clogged, repeat the process. This plunge-focused method is one of the most effective steps in sink unclogging.
Know When to Move on to Advanced Fixes
When simple methods like plunging or using a drain snake don’t clear your kitchen sink, it’s time to contemplate more advanced fixes. You’ll need to assess whether the issue requires a deeper approach or professional help. Knowing when to move on is key for effective DIY plumbing and avoiding costly emergency repairs.
Look out for these signs:
Watch for key signs indicating when basic fixes no longer suffice and it’s time to escalate your approach.
- Persistent clog despite multiple plunging attempts
- Water backing up into other drains or dishwasher
- Unpleasant odors that don’t dissipate after cleaning
- Visible leaks or damage under the sink cabinet
If you notice any of these, it’s a cue to stop relying on basic tools and consider more complex interventions or call a plumber. Trying advanced fixes without the right skills can worsen the problem.
Being mindful saves time, money, and stress, so don’t hesitate to escalate your approach when needed.
How to Remove and Clean the P-Trap
First, locate the P-trap—the curved pipe beneath your sink that can collect debris. Before you loosen it, place a bucket underneath to catch any water, and grab a wrench or pliers.
Next, loosen the slip nuts and remove the trap. Then scrub away any buildup with a brush and soapy water to help restore the flow.
Locating The P-Trap
You’ll find the P-trap directly beneath your kitchen sink, shaped like a curved pipe designed to catch debris and prevent odors from coming up through the drain. To locate it efficiently, follow these tips:
- Check plumbing diagrams or your sink’s manual for exact placement.
- Look for a U-shaped or S-shaped bend in the pipe assembly.
- Identify pipe materials—usually PVC or metal—that form the P-trap.
- Inspect the area under the sink, near where the drain pipe exits.
Knowing the P-trap’s location helps you remove it safely when unclogging. Its design plays an essential role in trapping solids and preventing sewer gases from entering your kitchen. Familiarizing yourself with common pipe materials also aids in handling and replacement if needed.
Cleaning Techniques And Tools
Having located the P-trap, the next step is to remove and clean it properly to clear any blockages. Start by placing a bucket underneath to catch water. Use adjustable plumbing tools like a wrench to loosen the slip nuts carefully. Once removed, inspect the trap for debris, hair, or grease buildup.
Clean the P-trap with a brush and warm, soapy water to restore proper flow. Regular sink maintenance like this prevents future clogs and extends your plumbing’s lifespan.
| Tool | Purpose |
|---|---|
| Adjustable wrench | Loosening slip nuts |
| Bucket | Catching water during removal |
| Brush | Scrubbing debris inside P-trap |
With these steps and tools, you’ll quickly restore your kitchen sink’s drainage.
Try a Drain Snake for Kitchen Sink Blockages
When a plunger doesn’t clear the clog, reaching for a drain snake can be your next best move. A drain snake, also known as a plumber’s auger, helps you reach deeper blockages that plungers can’t handle. It’s an essential tool for effective drain maintenance and pipe inspection right at home.
Here’s how to use it:
- Insert the snake’s end into the kitchen sink drain slowly.
- Rotate the handle clockwise to break up or hook the clog.
- Pull the snake out carefully, removing debris caught on the coil.
- Repeat the process if necessary until water flows freely.
Using a drain snake not only clears stubborn blockages but also gives you insight into pipe conditions, helping you spot issues early. Remember to clean your snake after use to keep it in good shape for future drain maintenance tasks.
Flush Your Kitchen Sink Drain With Hot Water to Test Flow
Although it may seem simple, flushing your kitchen sink drain with hot water is an essential step to test if the clog has been fully cleared. After using tools like a drain snake, pour a steady stream of hot water down the drain. This helps confirm whether water flows freely or if any resistance remains.
During this drain inspection, pay close attention to how quickly the water drains and whether any gurgling sounds occur. These signs can indicate lingering blockages or potential issues in your pipes.
Regularly flushing with hot water also supports effective pipe maintenance by dissolving grease buildup and preventing debris from settling. If the water backs up or drains slowly, you might need to repeat unclogging efforts or consider professional help.
Taking this quick step ensures your kitchen sink functions smoothly and helps catch problems early before they worsen.
Prevent Future Sink Clogs With Simple Habits
If your kitchen sink still drains slowly after flushing with hot water, it’s a good idea to adopt habits that keep clogs from forming in the first place. Good kitchen organization plays a key role in preventing buildup that leads to blockages. You can take simple steps to protect your plumbing and extend the life of your pipes.
Here are some habits to incorporate into your routine:
- Avoid pouring grease, oil, or coffee grounds down the drain.
- Use a drain strainer to catch food scraps and debris.
- Regularly flush your drain with hot water or a baking soda and vinegar mixture.
- Schedule routine plumbing maintenance to catch issues early.
Frequently Asked Questions
Can Chemical Drain Cleaners Damage My Kitchen Sink Pipes?
Yes, chemical drain cleaners can damage your kitchen sink pipes. The strong chemical reactions they cause often lead to pipe corrosion, especially if you use them frequently or leave them sitting too long.
Over time, this corrosion weakens the pipes, increasing the risk of leaks or bursts. It’s better to use safer methods or mechanical tools like a plunger or drain snake to avoid harming your plumbing system.
How Often Should I Clean My Kitchen Sink Drain to Avoid Clogs?
You might think cleaning your kitchen sink drain once a year is enough, but regular drain maintenance calls for a more frequent approach. To keep clog prevention effective, you should clean your drain at least once a month.
This habit prevents buildup and keeps water flowing smoothly. By staying consistent, you avoid stubborn blockages and costly repairs, making your kitchen chores easier and your sink happier.
Are There Natural Alternatives to Baking Soda and Vinegar for Unclogging?
Yes, you can use eco friendly solutions like salt combined with hot water or a mixture of lemon juice and borax as homemade remedies to unclog your kitchen sink. These alternatives work well without harsh chemicals, keeping your plumbing safe and the environment happy.
Just pour the mixture down the drain, let it sit for a while, then flush with boiling water. You’ll find these natural methods effective and gentle.
What Should I Do if My Kitchen Sink Has a Foul Odor After Unclogging?
If your kitchen sink has a foul odor after unclogging, it’s likely due to trapped food debris or bacteria buildup. To tackle this, pour a mixture of lemon juice and hot water down the drain to neutralize smells.
For odor prevention tips, regularly flush your sink with boiling water and use a drain strainer to catch debris. Keeping the drain clean and dry helps stop foul odor causes from returning.
Can Clogged Kitchen Sinks Cause Water Damage in Other Parts of the House?
Yes, a clogged kitchen sink can definitely cause water damage in other parts of your house. When your plumbing system is backed up, water can overflow or leak into cabinets, floors, and walls, leading to mold and structural issues.
If you don’t address the clog quickly, you risk extensive damage that’s costly to fix. Keep your plumbing system clear to prevent water damage and protect your home’s integrity.
Conclusion
Now that you’ve got the tools and know the steps, imagine tackling that stubborn clog with confidence. What if the solution is simpler than you thought? Each step brings you closer to a free-flowing sink, but don’t stop now. There’s one final trick to keep your drain running smoothly.
Ready to uncover it and bid farewell to kitchen sink clogs? Your sink’s future is in your hands. With these tips, you’ll know how to unclog a kitchen sink and help keep it flowing smoothly.