How to Paint Kitchen Cabinets in 10 Easy Steps
Painting kitchen cabinets can transform your space, but getting a smooth, durable finish can feel overwhelming. You’re not alone—many people struggle with knowing where to start and which steps matter most.
This guide to how to paint kitchen cabinets breaks the process into 10 easy steps.
To paint your kitchen cabinets in 10 easy steps, start by gathering tools and safely removing doors and hardware.
Thoroughly clean and degrease all surfaces, then sand cabinets for a smooth finish.
Apply a coat of primer to help paint stick better.
Use brushes and rollers for even painting, allowing each coat to dry before adding more.
Finally, reinstall hardware and consider a protective topcoat for durability.
Follow these steps and you’ll soon enjoy refreshed, beautiful cabinets with lasting results.
Key Takeaways
- Remove cabinet doors and hardware, label parts, and clean surfaces thoroughly to ensure paint adhesion.
- Sand cabinets with fine-grit sandpaper to smooth surfaces and improve primer bonding.
- Apply a suitable primer evenly to seal surfaces and enhance paint durability.
- Use angled brushes and foam rollers for even paint application, following wood grain and avoiding drips.
- Allow proper drying between thin coats, then reinstall hardware and consider a protective topcoat for lasting finish.
Is Painting Kitchen Cabinets Right for You?

Before you plunge into painting your kitchen cabinets, consider whether this project fits your needs and skills. Painting cabinets requires patience, attention to detail, and some DIY experience.
Assess your skills and patience before starting to paint kitchen cabinets for the best results.
If you’re comfortable with sanding, priming, and applying multiple coats of paint evenly, this can be a rewarding way to refresh your kitchen without a full remodel. However, if you’re short on time or prefer a quicker update, cabinet maintenance like cleaning and minor repairs might be better.
Keep in mind that painting cabinets is a significant part of kitchen remodeling, affecting both aesthetics and durability. Poor preparation or rushed work can lead to peeling or chipping, which means more work down the line.
If you enjoy hands-on projects and want to save money compared to replacing cabinets, painting is a smart choice. Otherwise, consulting a professional might be worth it for a flawless finish and lasting results.
Gather Essential Tools for Painting Cabinets
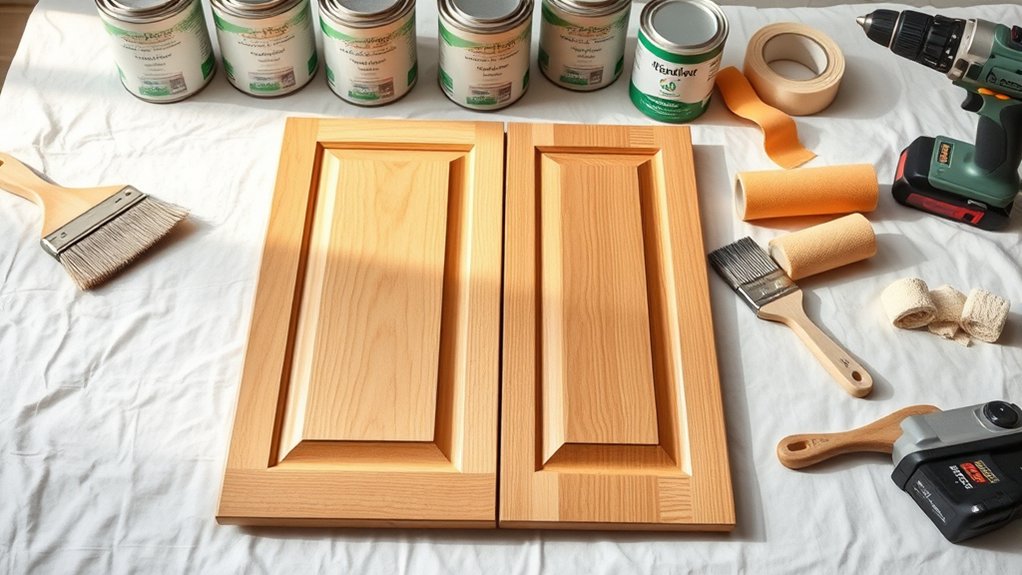
Before you start painting, gather the tools and supplies you’ll need for a smooth, efficient job. Choose quality brushes and paint, and be sure to have essential safety gear on hand. With everything ready, you can work more easily and protect yourself throughout the project.
Must-Have Painting Tools
When you’re ready to transform your kitchen cabinets, having the right tools will make all the difference in achieving a smooth, professional finish. Start with quality brushes and foam rollers designed for cabinets; they help you apply paint evenly and reach tight corners.
A sturdy painter’s tape protects your walls and hardware while allowing clean edges, essential for crisp decorative techniques. Don’t forget sandpaper or a sanding block to prep surfaces for better paint adhesion.
A putty knife and wood filler will fix imperfections before painting. Plus, keep a drop cloth handy to protect your floors. With these must-have painting tools, you’ll confidently investigate various color options and decorative techniques that bring fresh style to your kitchen cabinets.
Choosing Quality Paint Supplies
Although selecting the right paint might seem straightforward, choosing quality paint supplies is essential to achieving durable, smooth, and vibrant kitchen cabinets.
Start by picking high-quality brushes and rollers designed for cabinet surfaces to ensure even application without streaks. Understanding color theory helps you select shades that complement your kitchen’s lighting and style, making your cabinets pop.
In terms of paint finishes, opt for semi-gloss or satin. They resist moisture and are easy to clean, perfect for kitchen use.
Don’t forget quality primer, which helps paint adhere better and extends longevity. Investing in the right supplies saves you time and effort, ultimately delivering professional-looking results that stand up to daily wear and tear.
Safety Gear Essentials
Choosing the right paint and tools sets you up for success, but protecting yourself during the process is just as important. Before you start painting kitchen cabinets, make sure you follow essential safety precautions.
Wearing protective gear like gloves, goggles, and a mask will shield you from harmful fumes, dust, and paint splatters. Select a well-ventilated workspace to reduce inhaling fumes. Long sleeves and old clothes help guard your skin from irritation.
Don’t forget ear protection if you use power tools for sanding. By prioritizing safety precautions and wearing the right protective gear, you’ll keep yourself safe and comfortable throughout the project.
Taking these simple steps ensures your cabinet painting experience is both successful and injury-free.
How to Safely Remove Cabinet Doors and Hardware

Before you start painting, you’ll want to remove the cabinet doors and hardware carefully to avoid damage. Proper cabinet removal guarantees you don’t harm the wood or the finish, making your painting job much easier. For hardware safety, keep everything organized and protected to reuse or replace later.
Here’s how to safely remove cabinet doors and hardware:
- Use a screwdriver to loosen hinges and handles gently, avoiding stripping screws.
- Label each door and its corresponding hardware with painter’s tape or masking tape to keep track during reinstallation.
- Place screws, hinges, and handles in small containers or ziplock bags to prevent loss or damage.
Taking these steps will streamline your project, protect your cabinets, and keep hardware intact. Now, you’re ready to move on to prepping the surfaces for painting.
Clean and Degrease Cabinets Thoroughly Before Painting
Since grease and dirt can prevent paint from adhering properly, you need to clean and degrease your cabinets thoroughly before painting. Proper cabinet cleaning is an essential step in surface preparation that guarantees your paint job lasts longer and looks smooth.
Use a strong degreaser or a mixture of warm water and dish soap to wipe down every inch of your cabinet surfaces, including corners and edges.
Here’s a quick guide to effective cabinet cleaning:
| Step | What to Use |
|---|---|
| Remove dust | Dry microfiber cloth |
| Degrease surfaces | Commercial degreaser or soap |
| Rinse and dry | Clean water and lint-free cloth |
Make sure to let the cabinets dry completely before you move on. Skipping this step can lead to peeling or bubbling paint, so don’t rush the surface preparation—it’s vital to a professional finish!
How to Sand Cabinets for a Smooth Finish
Although cleaning removes dirt and grease, sanding your cabinets is essential to create a smooth surface that helps the paint adhere better. Start by selecting the right sanding tools—fine-grit sandpaper or a sanding block works well for most cabinets.
Cleaning clears grime, but sanding ensures a smooth surface for better paint adhesion.
Always sand in the grain direction to avoid scratches that could show through your paint.
Here’s how to sand effectively:
- Use 120- to 150-grit sandpaper for initial sanding to smooth out imperfections.
- Follow up with 220-grit sandpaper to create an ultra-smooth surface for painting.
- Wipe down the cabinets with a damp cloth after sanding to remove dust.
Choose the Best Paint and Color for Cabinets
Picking the right paint and color can make or break your kitchen cabinet makeover. When choosing paint, consider both durability and appearance. Opt for a high-quality, durable paint designed for cabinetry, such as acrylic enamel or latex-based paint, which offers smooth coverage and resists chipping.
The paint finish matters too. Semi-gloss or satin finishes are ideal because they’re easy to clean and highlight your cabinets’ details without being too shiny.
Think about color psychology to set the right mood in your kitchen. Light colors like soft whites or pastels create an airy, spacious feel, while darker hues like navy or charcoal offer a sophisticated, cozy atmosphere.
Bright colors can energize, and neutrals provide timeless appeal. Remember to test samples in your kitchen’s lighting before committing. By carefully selecting your paint and color, you guarantee your cabinets look stunning and stand up to daily wear.
Apply Primer on Kitchen Cabinets for Better Adhesion
Apply primer to your kitchen cabinets to help the paint adhere and last longer. Choose a primer that’s right for your cabinet material, then spread it evenly. Let it dry completely before you start painting.
Importance Of Primer
Since kitchen cabinets endure frequent use and exposure to moisture, applying a primer is essential for ensuring your paint sticks properly and lasts longer. Primer creates a smooth base that improves adhesion, preventing peeling and chipping over time.
It also helps you achieve true color coordination by allowing the paint to appear vibrant and even, no matter your cabinet styles. Without primer, you risk uneven finishes and a less durable surface.
Here’s why primer matters:
- Seals porous surfaces to block stains and moisture
- Provides a uniform base for better paint coverage
- Improves durability, extending your cabinet’s fresh look
Choosing The Right Primer
How do you choose the right primer to guarantee your kitchen cabinets get the best adhesion? Start by understanding the different primer types available. Oil-based primers work great for covering stains and sealing wood, while water-based primers dry faster and are easier to clean up.
If your cabinets have glossy finishes, a bonding primer is your best bet to assure paint sticks well. Also, consider color options—gray primers improve the richness of dark paints, while white primers are perfect for light colors.
Choosing the right primer type and color option can make a big difference in the final look and durability of your cabinets. Keep these factors in mind to set a solid foundation for your painting project.
Proper Primer Application
When should you apply primer to get the best adhesion on your kitchen cabinets? You want to ensure the surface is clean, dry, and sanded before applying primer. This step is crucial for smooth color mixing and achieving long-lasting decorative finishes. Use even strokes and cover every corner to prevent peeling later. Keep these tips in mind:
- Use a high-quality brush or roller for smooth application
- Apply thin, even coats to avoid drips and texture issues
- Allow the primer to fully dry before sanding or painting
Proper primer application creates a solid base that enhances paint adhesion and durability. It also helps the paint’s color pop and keeps decorative finishes looking fresh. Taking your time here will save you from touch-ups down the road.
Use Brush and Roller Techniques to Paint Cabinets Smoothly
Although painting cabinets may seem straightforward, mastering brush and roller techniques is key to achieving a smooth, professional finish. Start with brush techniques for edges and corners where rollers can’t reach.
Use a high-quality angled brush to apply paint in long, even strokes, following the wood grain to avoid streaks. Keep your brush clean and avoid overloading it to prevent drips.
For larger flat surfaces, switch to roller methods. Choose a small foam roller for a fine, smooth texture without brush marks.
Roll the paint on lightly in overlapping strokes, maintaining a wet edge to blend sections seamlessly. Avoid pressing too hard, which can cause uneven coverage or bubbles.
Let Paint Dry and Apply Additional Coats as Needed
After applying the first coat, let the paint dry completely to prevent smudges or an uneven texture. Check the manufacturer’s recommended drying time before applying another coat. If needed, add more coats until you get full coverage and a smooth finish.
Drying Time Importance
How long you let the paint dry can make all the difference in achieving a smooth, durable finish on your kitchen cabinets. Proper drying time guarantees that each coat cures fully before you add another, preventing smudges and uneven textures.
Remember, paint curing is a chemical process that strengthens the finish over time, so patience is key.
To maximize your results, keep these points in mind:
- Allow sufficient drying time between coats, typically a few hours or as recommended by the paint manufacturer.
- Avoid rushing the process; touching or recoating too soon can cause peeling or bubbling.
- Ensure good ventilation and stable temperature to aid the paint curing process effectively.
When To Recoat
When should you recoat your kitchen cabinets to achieve the best finish? You need to let the first coat dry completely before applying another. This guarantees proper color matching and prevents uneven texture.
The recoating frequency depends on the paint type and drying conditions—usually 4-6 hours for latex paint and up to 24 hours for oil-based. Apply additional coats until the color looks uniform and the surface feels smooth.
| Feeling Frustrated? | Take a Break, Let it Dry |
|---|---|
| Impatient for Results? | Remember, Quality Takes Time |
| Worried About Color Match? | Multiple Thin Coats Help |
Patience during recoating guarantees a professional-looking, long-lasting finish.
Reinstall Cabinet Doors and Finish With a Protective Topcoat
Although reinstalling cabinet doors can feel like a final hurdle, you’ll find the process straightforward if you take your time aligning hinges and handles properly. Start by carefully reattaching each door, making sure the cabinet hardware fits snugly and operates smoothly. Proper alignment avoids uneven gaps and ensures the doors open without snagging.
Next, don’t forget cabinet venting—if your cabinets require it, reinsert or adjust vents to maintain airflow and prevent moisture buildup.
Finally, apply a protective topcoat to seal your hard work. This layer guards against scratches, stains, and moisture and improves durability.
Keep these tips in mind:
- Use a drill with the right bit for cabinet hardware screws to avoid stripping.
- Check door alignment by closing doors slowly to spot misalignments.
- Apply a thin, even coat of polyurethane or water-based sealer for best results.
Reinstalling and finishing your cabinets properly will give your kitchen a polished, long-lasting look.
Frequently Asked Questions
How Long Does the Entire Cabinet Painting Process Usually Take?
The entire cabinet painting process usually takes about 3 to 5 days. You’ll spend the first day on prep work like sanding and cleaning. Color matching can slow you down if you want the perfect shade, so allocate extra time there.
Applying paint with proper brush techniques takes patience, especially for smooth, even coats. Drying time between coats is essential, so don’t rush—it ensures a durable, professional finish you’ll love.
Can I Paint Cabinets Without Removing the Doors and Hardware?
Yes, you can paint cabinets without cabinet removal, but it’s trickier. Leaving doors and hardware on means you’ll need extra patience to paint edges and avoid drips. You’ll have to carefully tape around hardware and hinges to prevent paint smudges. However, cabinet removal makes the job easier and gives cleaner results. If you want a smooth finish and plan hardware replacement later, it’s best to remove doors and hardware first.
What Is the Best Time of Year to Paint Kitchen Cabinets?
The best time of year to paint kitchen cabinets is during spring or early fall when temperatures are mild and humidity is low. This helps the paint dry evenly and prevents issues like bubbling.
When choosing color selection, consider how natural light changes with the seasons. Opt for a paint finish like semi-gloss or satin for durability and easy cleaning. This way, your cabinets look fresh and hold up well year-round.
How Do I Prevent Paint From Peeling or Chipping Over Time?
To prevent paint from peeling or chipping over time, focus on thorough surface preparation. You’ll want to clean, sand, and prime your cabinets properly to guarantee paint durability.
Make certain the surface is smooth and free of grease or dust before painting. Use high-quality paint designed for cabinets, and apply thin, even coats. Finally, let each coat dry fully to create a strong, lasting finish that resists wear and tear.
Are There Eco-Friendly Paint Options Suitable for Kitchen Cabinets?
Yes, you can definitely use eco friendly paints for your kitchen cabinets. Look for low-VOC or zero-VOC options that reduce harmful emissions. Brands offering sustainable finishes often use natural ingredients and water-based formulas, making them safer for your home and the environment.
These paints still provide durability and a smooth finish, so you won’t have to sacrifice quality while going green. You’ll feel good about updating your kitchen sustainably!
Conclusion
So, you thought painting kitchen cabinets would be a quick fix to instantly transform your space? Surprise: it takes patience, prep, and a bit of elbow grease.
But once you’ve carefully sanded, primed, and painted every door and drawer, you’ll realize this “simple” project gave your kitchen a whole new life. Trust me, all those steps aren’t just busywork. They’re the secret to a finish that’ll make you proud every time you open a cabinet.
In the end, learning how to paint kitchen cabinets can give your kitchen a fresh look you’ll enjoy for years.